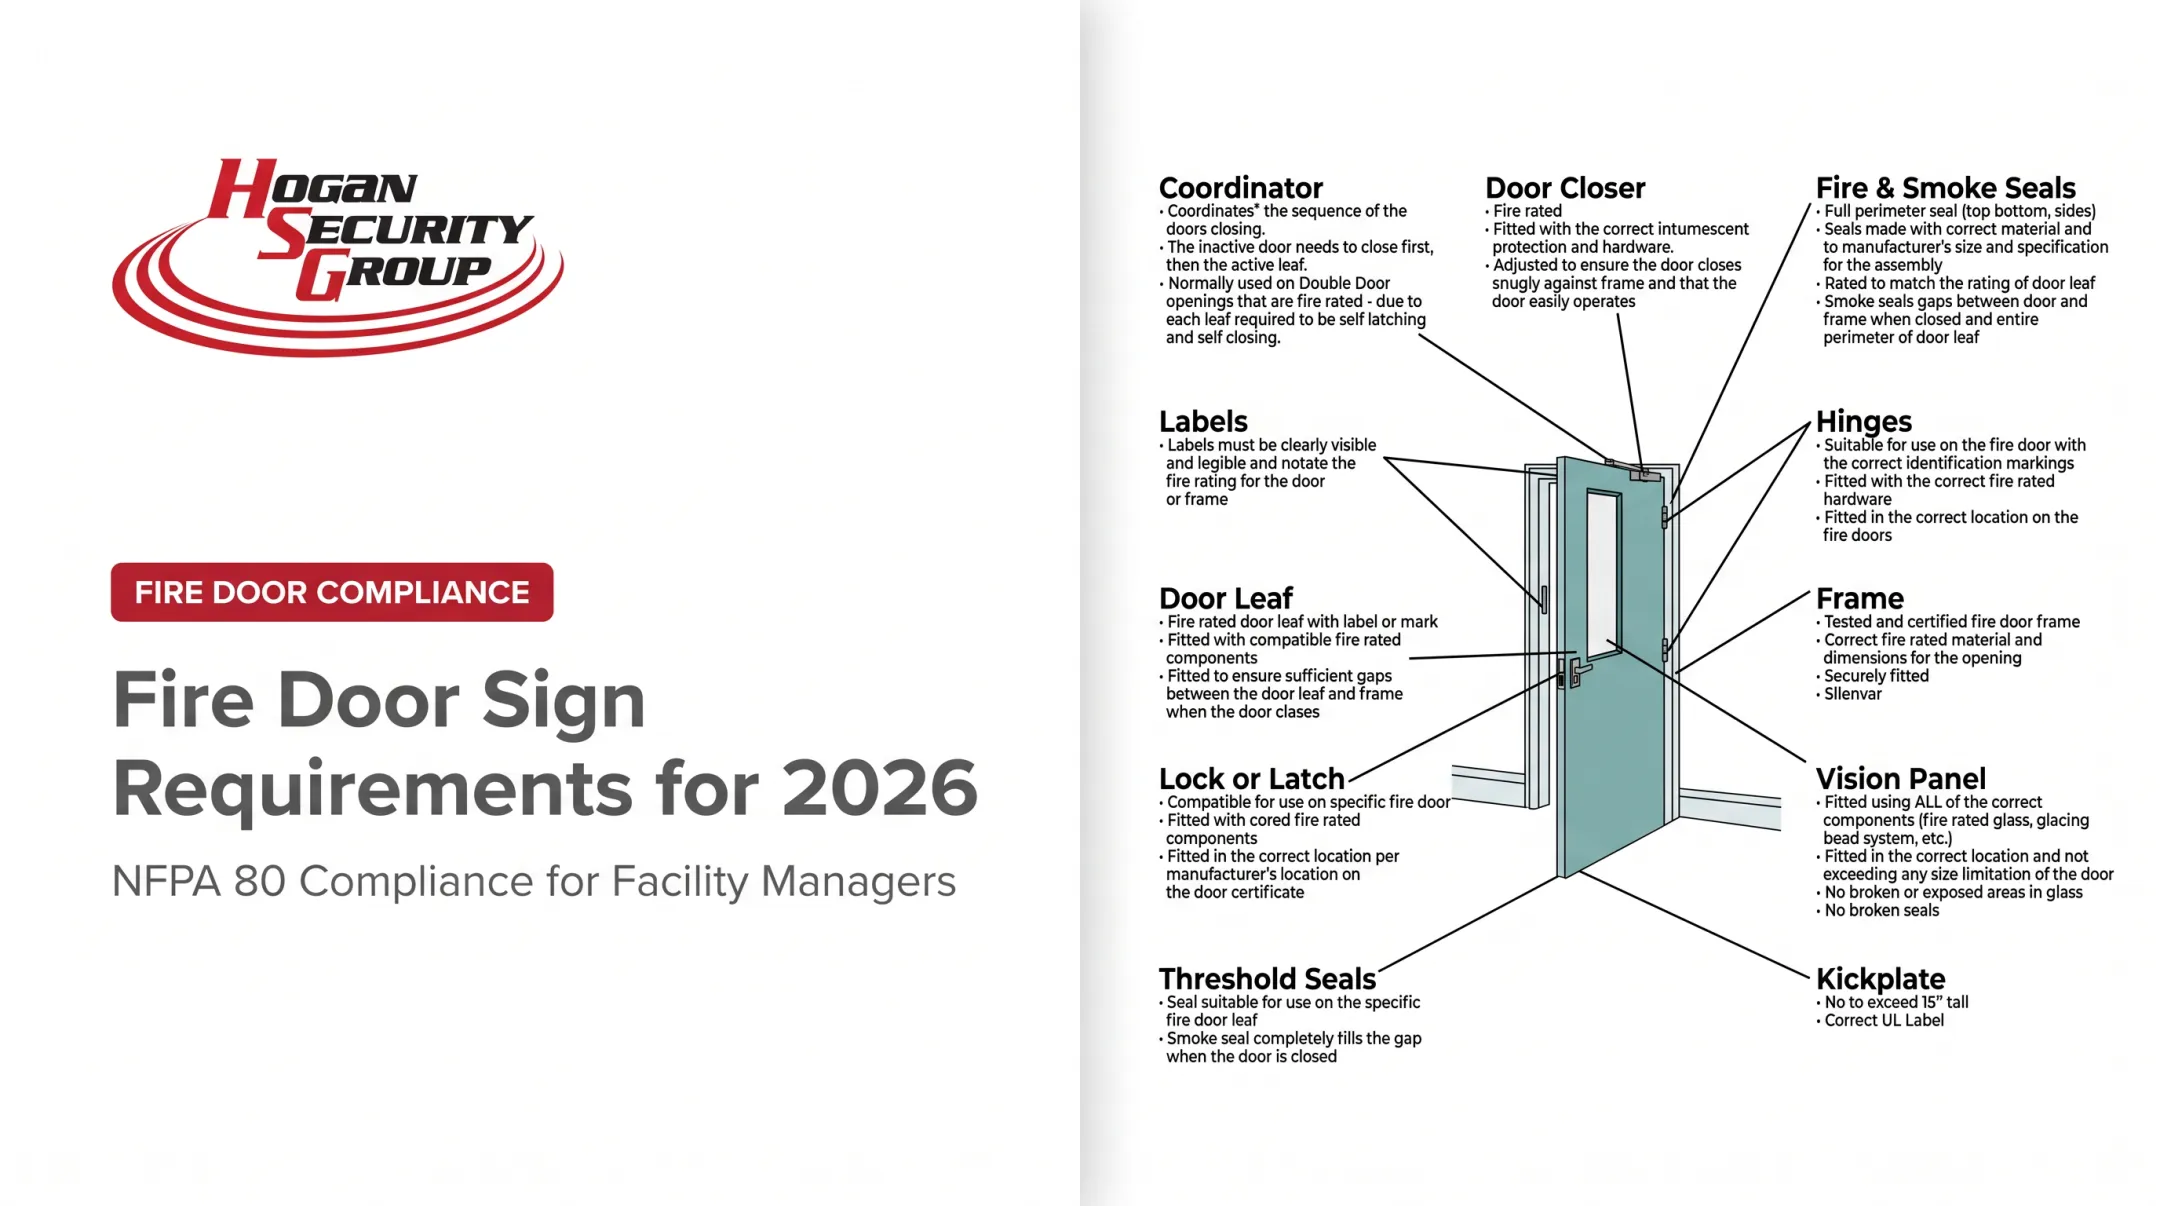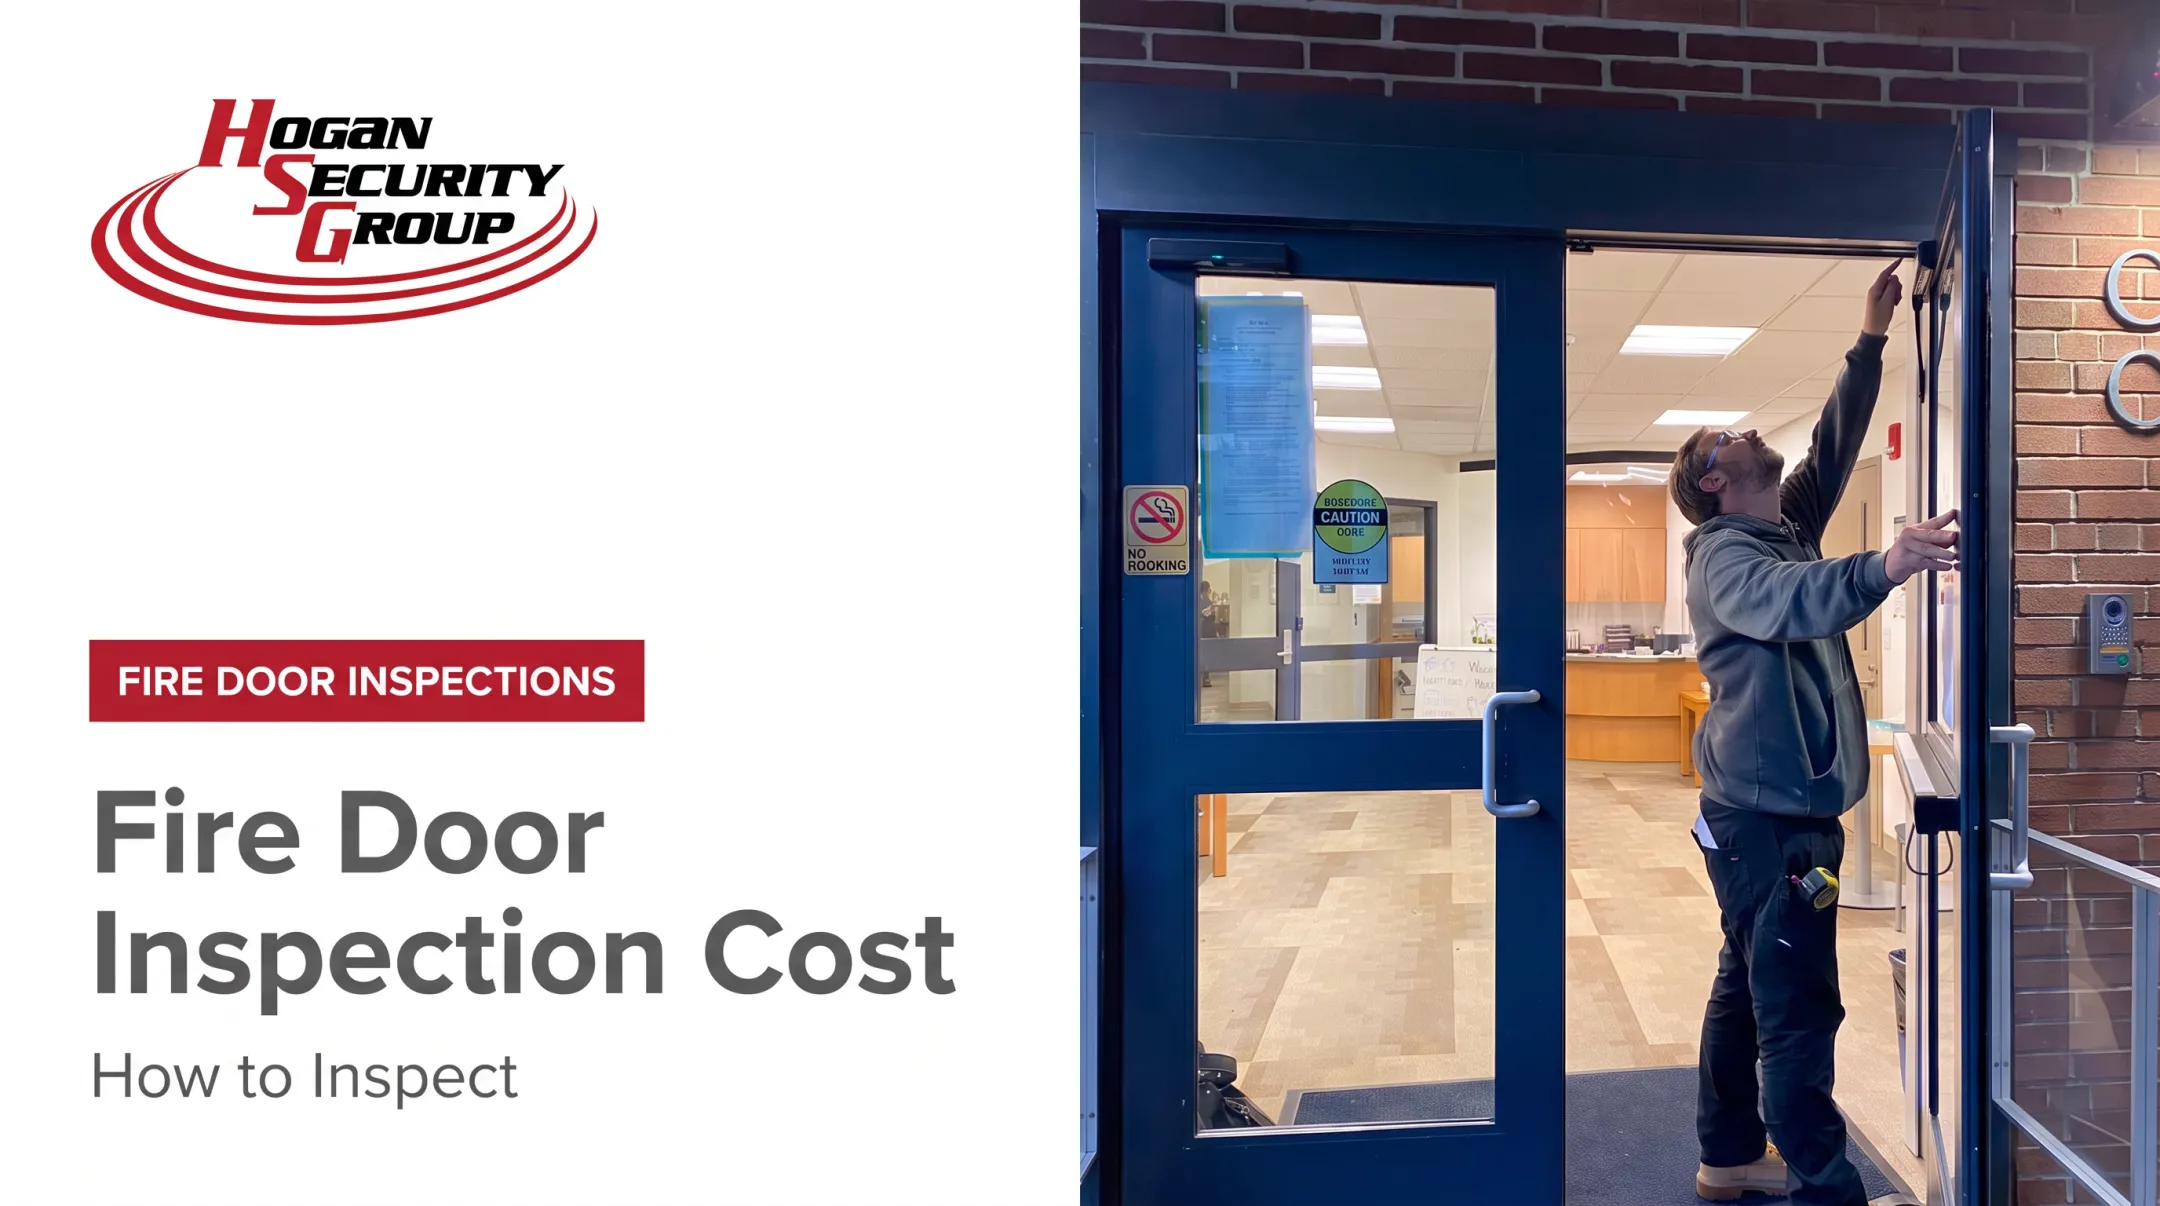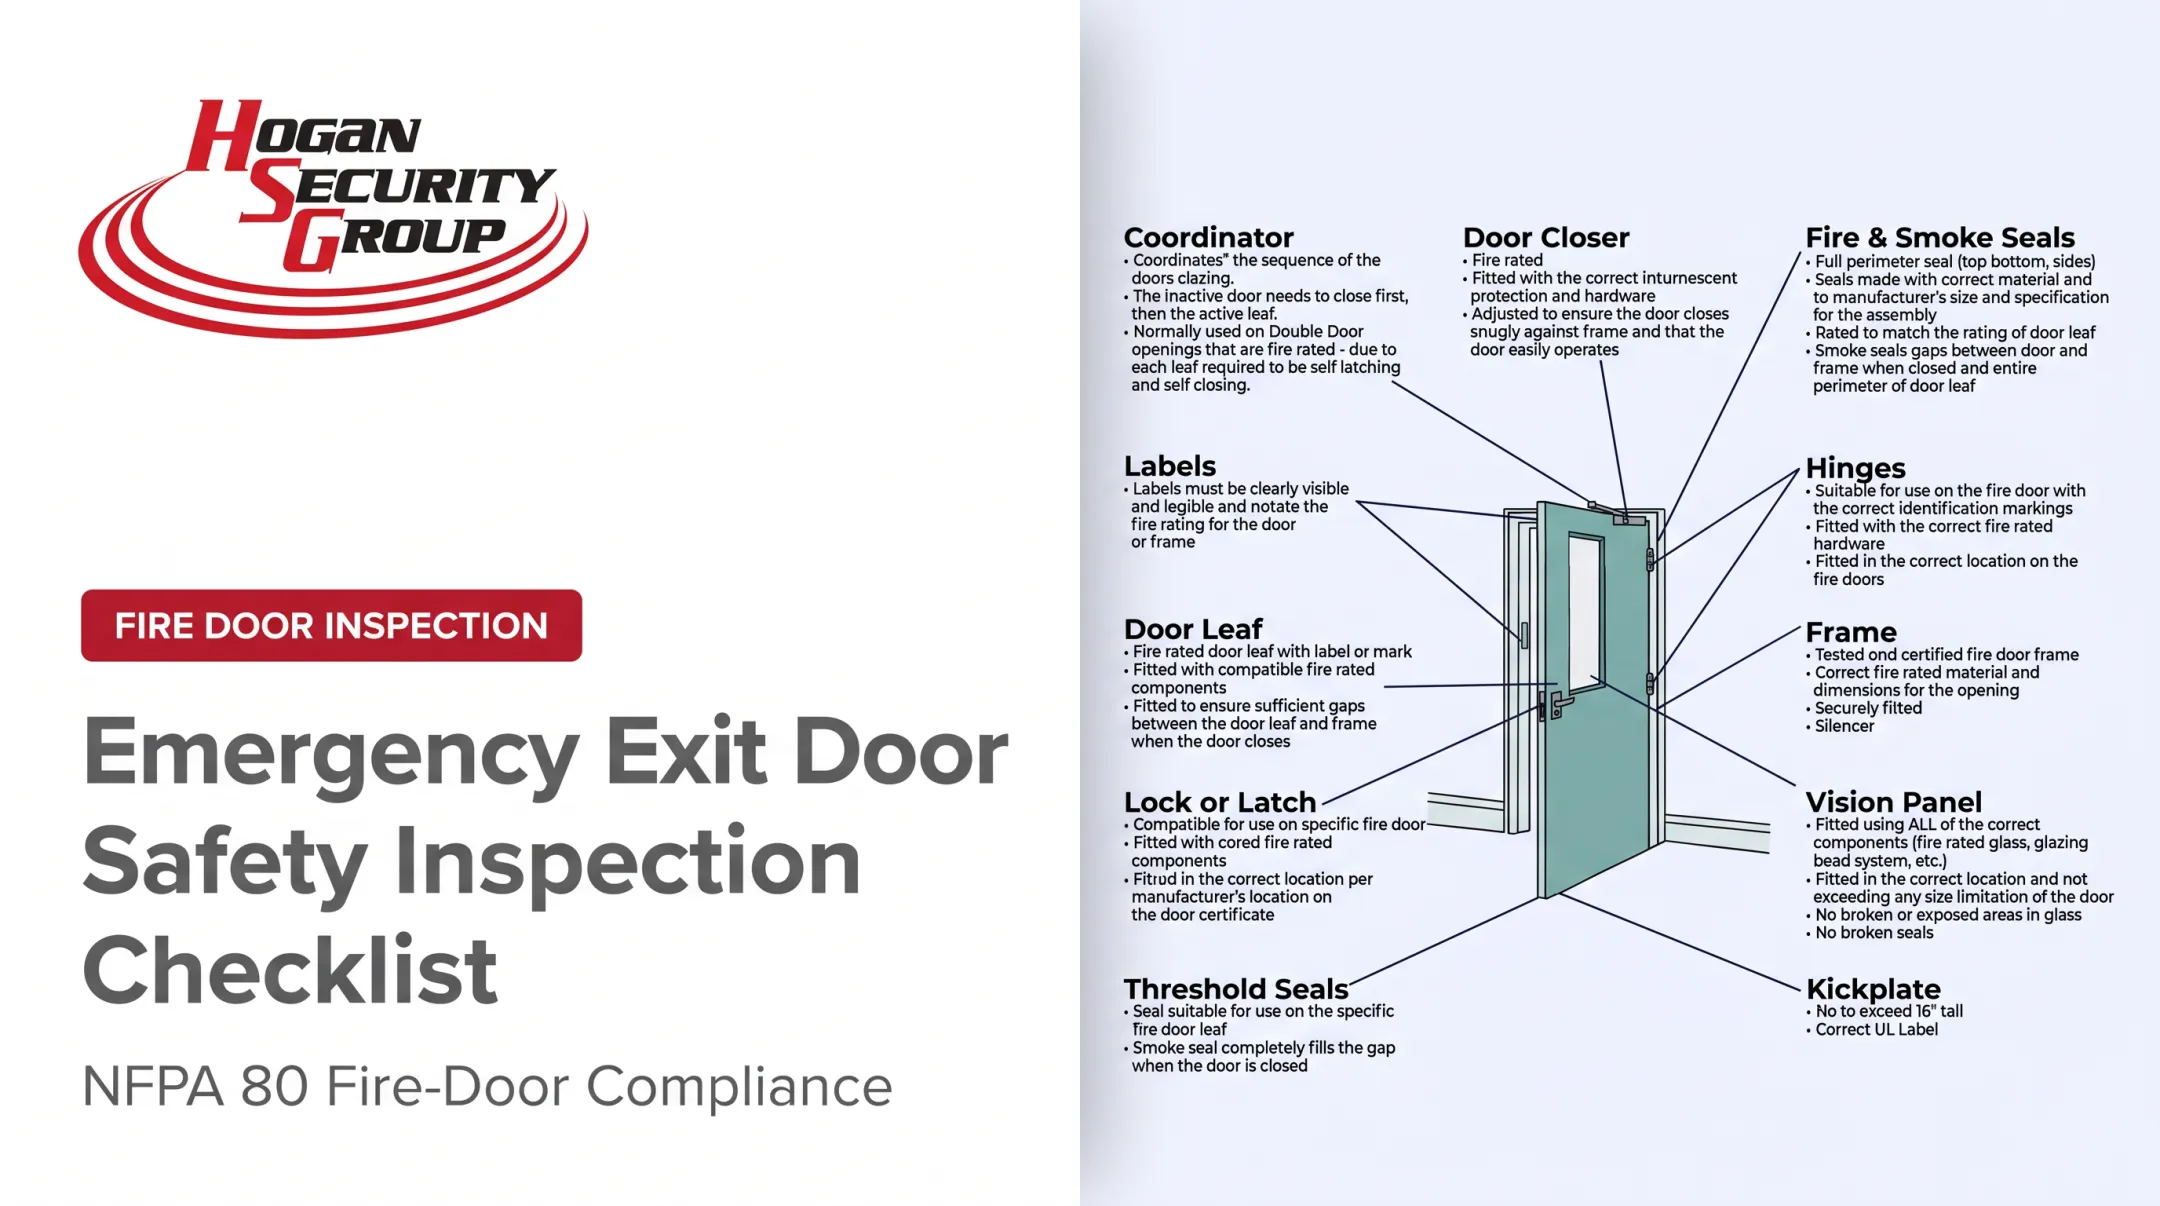

Many facility teams check that a door swings shut, mark it "fine," and move on. That overlooks the dozen other components that actually determine whether the opening will hold back fire and smoke during an emergency.
This guide walks through 13 inspection points that give facility teams in the United States a practical starting point. Every inspection should still be grounded in the current edition of NFPA80, applicable building and fire codes, the door's specific listing, and manufacturer instructions, since local adoption and door type change what "compliant" actually looks like.
We'll cover preparing an opening for inspection, completing visual and operational checks, recording evidence, interpreting findings, and knowing when a problem needs a qualified fire door professional instead of a quick maintenance fix.
Key Takeaways
- Inspect the full assembly across all 13 points, including labels, surfaces, glazing, hardware, clearances, closing, latching, seals, modifications, and signage
- Record every opening by location and identifier, backed by photos, measurements, and corrective-action owners
- Never make unapproved field modifications; verify repairs against the listing and manufacturer instructions
- Escalate doors that won't close or latch, have missing or damaged components, or carry unsupported modifications
What You Need to Check on a Fire Door
Preparation prevents incomplete inspections. Before approaching a door, know which opening you're inspecting, how it's used, what rating applies, and whether drawings or asset records exist.
Plan to access both sides of the assembly. A defect visible only from the hinge side gets missed far more often than it should.
Tools and Inspection Information Required
Gather these before you start:
- Flashlight for checking labels and gaps in dim corridors
- Inspection form or mobile device for on-the-spot documentation
- Camera for photographing defects and label plates
- Measuring tools for clearance and gap checks
- Stable access equipment for labels above easy reach
- Manufacturer or listing documentation for the assembly
- PPE matched to the facility and task
The 2025 NFPA80 standard sets out current provisions for visual inspection, clearances, operation, labels, hardware, seals, signage, and documentation.
Confirm which edition your local authority has adopted before you cite a specific clearance figure. Older editions reference different numbers and sections than the current standard.
Preconditions and Setup
Confirm you can inspect the door safely from both sides before beginning. Identify the configuration: single leaf, pair, oversized opening, glazed assembly, smoke door, or specialty unit.
Note anything that could limit access or block a full operational test, such as stored equipment in the swing path.
Record for every opening:
- Door number and exact location
- Assembly type and fire-rating information, if available
- Inspection date, inspector identity, and qualifications
- Any prior unresolved deficiency from a previous inspection
A compliant-looking door leaf doesn't guarantee a compliant assembly. A damaged frame, incompatible hardware, missing seal, excessive clearance, or failed closer can undermine the entire opening even when the slab itself looks fine. Inspect the system, not just the door.
Methods to Inspect Fire Doors
Three methods work together here: document and label review, detailed visual inspection, and controlled operational testing. None of them stands alone. A door can pass a visual scan and still fail to latch, and a door with a clean closing action can still carry an unsupported field modification that voids the label.
Document and Label Review
Start by checking the door and frame for a legible label, stamped plug, or other identification. Compare what the label states against available drawings, listing details, and manufacturer documentation.
Note whether the glazing, hardware, and seals appear consistent with the listed assembly. If identification is missing or you're unsure about compatibility, flag it for professional evaluation. Don't assume the opening passes just because nothing looks obviously wrong.
Capture the door's location, rating information, configuration, and photographs so results trace back to the correct opening during repairs or reinspection.
Visual Inspection of the 13 Points
This is the core of the checklist. The Door Security Institute's checklist organizes swinging fire door inspections around 13 points. For each one, record pass, deficiency, or not applicable, with a specific observation rather than a vague note like "door damaged."
| # | Inspection Point | What to Verify |
|---|---|---|
| 1 | Labels | Legible and visible on door and frame |
| 2 | Holes or breaks | No open holes or breaks in surfaces |
| 3 | Glazing and beads | Glazing and vision-light beads intact and fastened |
| 4 | Alignment and security | Door, frame, hinges, hardware, threshold aligned and undamaged |
| 5 | Missing or broken parts | No missing or broken hardware |
| 6 | Clearances | Within limits set by the listing and governing standard |
| 7 | Self-closing | Closer returns the door fully shut from full open |
| 8 | Coordinator | Inactive leaf closes before the active leaf, where installed |
| 9 | Latching | Hardware engages and secures the closed door |
| 10 | Auxiliary hardware | Nothing interferes with normal operation |
| 11 | Field modifications | No alterations that void the label |
| 12 | Gasketing or edge seals | Required seals present, intact, and continuous |
| 13 | Signage | Affixed correctly and doesn't obstruct operation |
Specific findings worth documenting include:
- Missing hinge screw
- Cracked glazing bead
- Closer that stops three inches short of closed
- Latch that doesn't engage on the first try
- Painted-over smoke seal
- Unapproved drilled hole for a coat hook
- Sign screwed through the gasketing
Check both sides of the door and the surrounding frame, threshold, and wall interface. Photograph every defect, and note explicitly when poor lighting, stored items, or restricted access prevented a complete check rather than skipping that item silently.

Operational Testing
Open the door from its normal operating positions and confirm it closes completely and latches without assistance. Follow the site's safety procedures and the assembly's specific hardware requirements while testing.
On pairs, check the sequence of operation and coordinator performance. Inspect electrified, hold-open, automatic, or access-control features only if you're trained and authorized to do so.
Record the exact failure mode, not just "fails." For example:
- Door fails to close from full open
- Door closes but doesn't latch
- Door rubs against the frame or floor
- Closing requires excessive force
- Auxiliary hardware obstructs the swing
Routine inspection shouldn't involve melting, dismantling, disabling, or altering components to test them. Hand that work to qualified repair personnel. The 2024 International Fire Code also prohibits blocking, obstructing, or rendering a fire door inoperable, which rules out any "test" that leaves a door propped or disabled afterward.
Corrective-Action and Reinspection Workflow
Every deficiency needs a complete record before anyone closes it out:
- Owner responsible for the fix
- Recommended action
- Priority and target date
- Current status
- Photos or supporting documents
Don't leave a finding floating without someone accountable for closing it.
Prioritize conditions that prevent closing or latching, compromise assembly integrity, or involve missing labels, damaged components, or unsupported modifications. Cross-check priorities against the building's fire risk assessment and any requirements from the authority having jurisdiction.
After repair, repeat the relevant visual and operational checks. Keep the original finding, the repair record, replacement component information, and the reinspection result together, not as separate, disconnected files.
How to Interpret the Results
A "pass" means the observed condition matched applicable requirements and available assembly information at the time of inspection. It doesn't certify performance beyond that specific inspection scope or guarantee the door will behave the same way six months later.
Normal or Acceptable Findings
A satisfactory opening shows:
- Identifiable, legible labels on door and frame
- Intact surfaces and glazing
- Secure, aligned hardware and hinges
- Complete hardware set, nothing missing
- Clearances consistent with applicable criteria
- Reliable closing and latching
- Intact required seals
- No interfering hardware or unsupported modifications
- Compliant, non-obstructive signage
Record a pass with concise evidence: the item checked, the test performed, and any relevant "not applicable" designation. A one-line note beats a checkmark with no context when someone reviews the file later.
Minor or Maintenance Issues
Some issues don't stop the door from operating today but need timely correction:
- Loose fastener
- Deteriorated seal
- Minor surface damage
- Unclear records
- Housekeeping concern near the opening
Confirm whether the issue actually affects the listed assembly before downgrading its priority.
Assign a corrective action and reinspection date. Don't informally wave the door through without documentation just because it still closes.
Hogan Security Group's internal inspection data from 2025 found that more than 65% of fire doors fail their annual inspection, but over 90% of those failures can be fixed quickly within a standard facility maintenance budget. Most problems are loose closers, missing hardware, or damaged seals, not structural replacements.

Out-of-Specification or Critical Findings
Escalate immediately when:
- The door won't close or latch
- A required component is missing or broken
- Glazing or the frame is compromised
- Clearances appear inconsistent with applicable criteria
- The label is missing or illegible
- Field modifications can't be supported by the listing
Notify the responsible facility contact, restrict use of the opening if appropriate, and make sure the door can't be propped open while repairs are pending. Arrange qualified repair or evaluation, and follow the site's emergency plan and authority guidance for interim controls.
A deficiency isn't automatically a confirmed code violation. Treat it that way only when the applicable code, listing, or a qualified authority actually supports that conclusion.
Reporting and Trend Review
A usable report captures:
- Property and area
- Door identifier
- Inspection date and inspector
- Result for each of the 13 points
- Photographs and measurements where relevant
- Deficiency description, risk, and priority
- Recommended action, responsible party, and completion date
- Reinspection outcome
Review recurring failures by building, door type, hardware brand, traffic level, or contractor work. That pattern tells you where to put your maintenance budget and which doors are better off replaced than repaired repeatedly.
Common Errors and Safety Best Practices
Most unreliable inspections share the same handful of mistakes:
- Checking only one side of the door
- Skipping the label or ignoring the frame entirely
- Applying a generic clearance number instead of checking the governing criteria
- Overlooking pairs and coordinator function
- Accepting a door that closes but doesn't actually latch
- Failing to document "not applicable" items, leaving gaps in the record
Avoid field modifications without confirming compatibility first. Any of these can void the listing even if the door still looks and closes fine:
- Painting over seals
- Drilling new holes
- Trimming the bottom of a door
- Swapping hardware
- Removing labels
- Changing seal types
Safe access matters during every inspection. Coordinate with building occupants and keep egress routes clear while you test. Use proper PPE and stable access equipment, and keep hands away from closing and latching points. Follow site procedures for electrified or access-controlled doors rather than improvising.
Stop and escalate when an opening has unfamiliar hardware, significant damage, missing identification, difficult access, or a failed safety function. That's a job for a competent fire door inspector, not a maintenance checklist.
Hogan Security Group's FDAI-certified inspectors handle formal fire door inspections for schools, healthcare facilities, hospitals, and commercial properties across New Jersey, Pennsylvania, New York, and Connecticut. Manufacturer-supported repair services cover deficiencies a maintenance team should not tackle alone.

If your in-house inspection surfaces a complex or unresolved deficiency, request an inspection rather than guessing at a fix.
Conclusion
A 13-point checklist creates consistency, but reliable fire door compliance comes from inspecting the complete assembly, documenting evidence, correcting defects, and verifying every repair.
Align inspection schedules and corrective actions with the current NFPA80 requirements, applicable local codes, your building's fire risk assessment, and manufacturer or listing information. A schedule that worked under an older code edition might not satisfy today's AHJ.
Start with three steps:
- Inventory every rated opening
- Assign qualified inspection responsibility
- Build a tracked reinspection process for every deficiency you find
The doors that fail quietly are the ones nobody's been checking consistently.
Frequently Asked Questions
What should be included in a fire door inspection checklist?
A complete checklist covers 13 points: labels, surface condition, glazing, hardware alignment, clearances, closing, latching, seals, modifications, and signage. It should also capture documentation, photographs, and corrective-action tracking for any deficiency found.
What are the inspection requirements for fire doors according to NFPA80?
NFPA80 sets inspection criteria for fire door assemblies, covering visual checks, operational testing, and documentation. Verify the current edition, applicable section, and any modifications adopted by your local authority having jurisdiction before relying on specific numbers.
What is a fire inspection form?
It's a record documenting what was inspected, when, and by whom, including the condition of each checklist item, evidence of deficiencies, corrective actions taken, and follow-up results. It should be signed and retained for review by the authority having jurisdiction.
How often should fire doors be inspected?
Frequency depends on the current NFPA80 edition, occupancy type, risk level, building policy, and local requirements, with annual inspection as a common baseline. Confirm the exact schedule with your AHJ or a qualified fire door professional.
Who is qualified to inspect fire doors?
The inspector needs the training, knowledge, and experience to evaluate fire door assemblies against applicable requirements. For formal assembly inspections, an FDAI-certified specialist is often the right choice.
What should you do if a fire door fails inspection?
Document the defect, address anything preventing proper closing or latching right away, and arrange qualified repair or evaluation. Complete a documented reinspection once corrective work is finished to confirm the fix actually held.