
Introduction
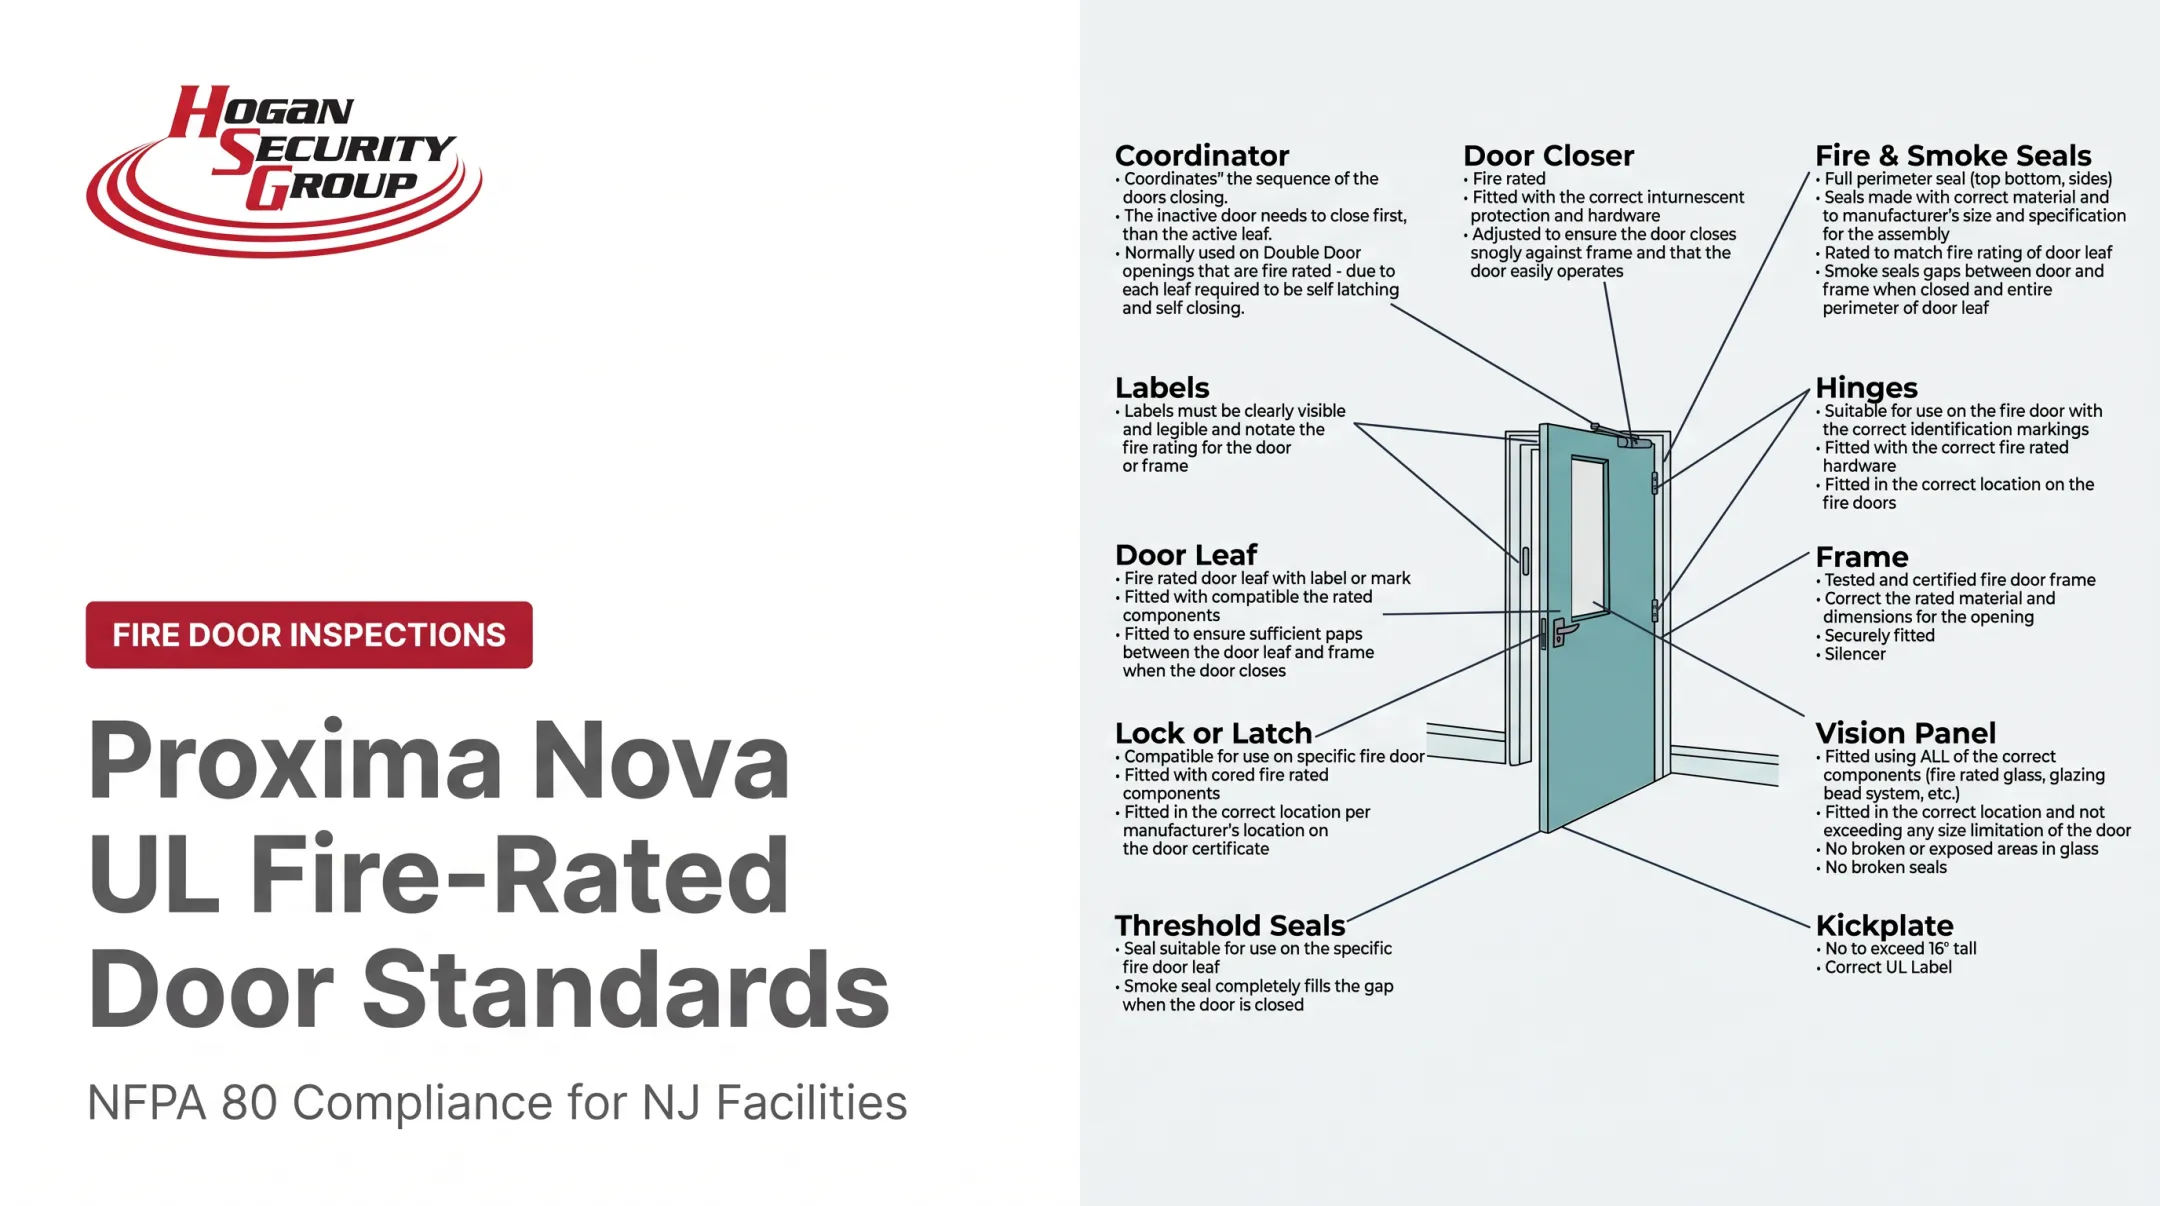
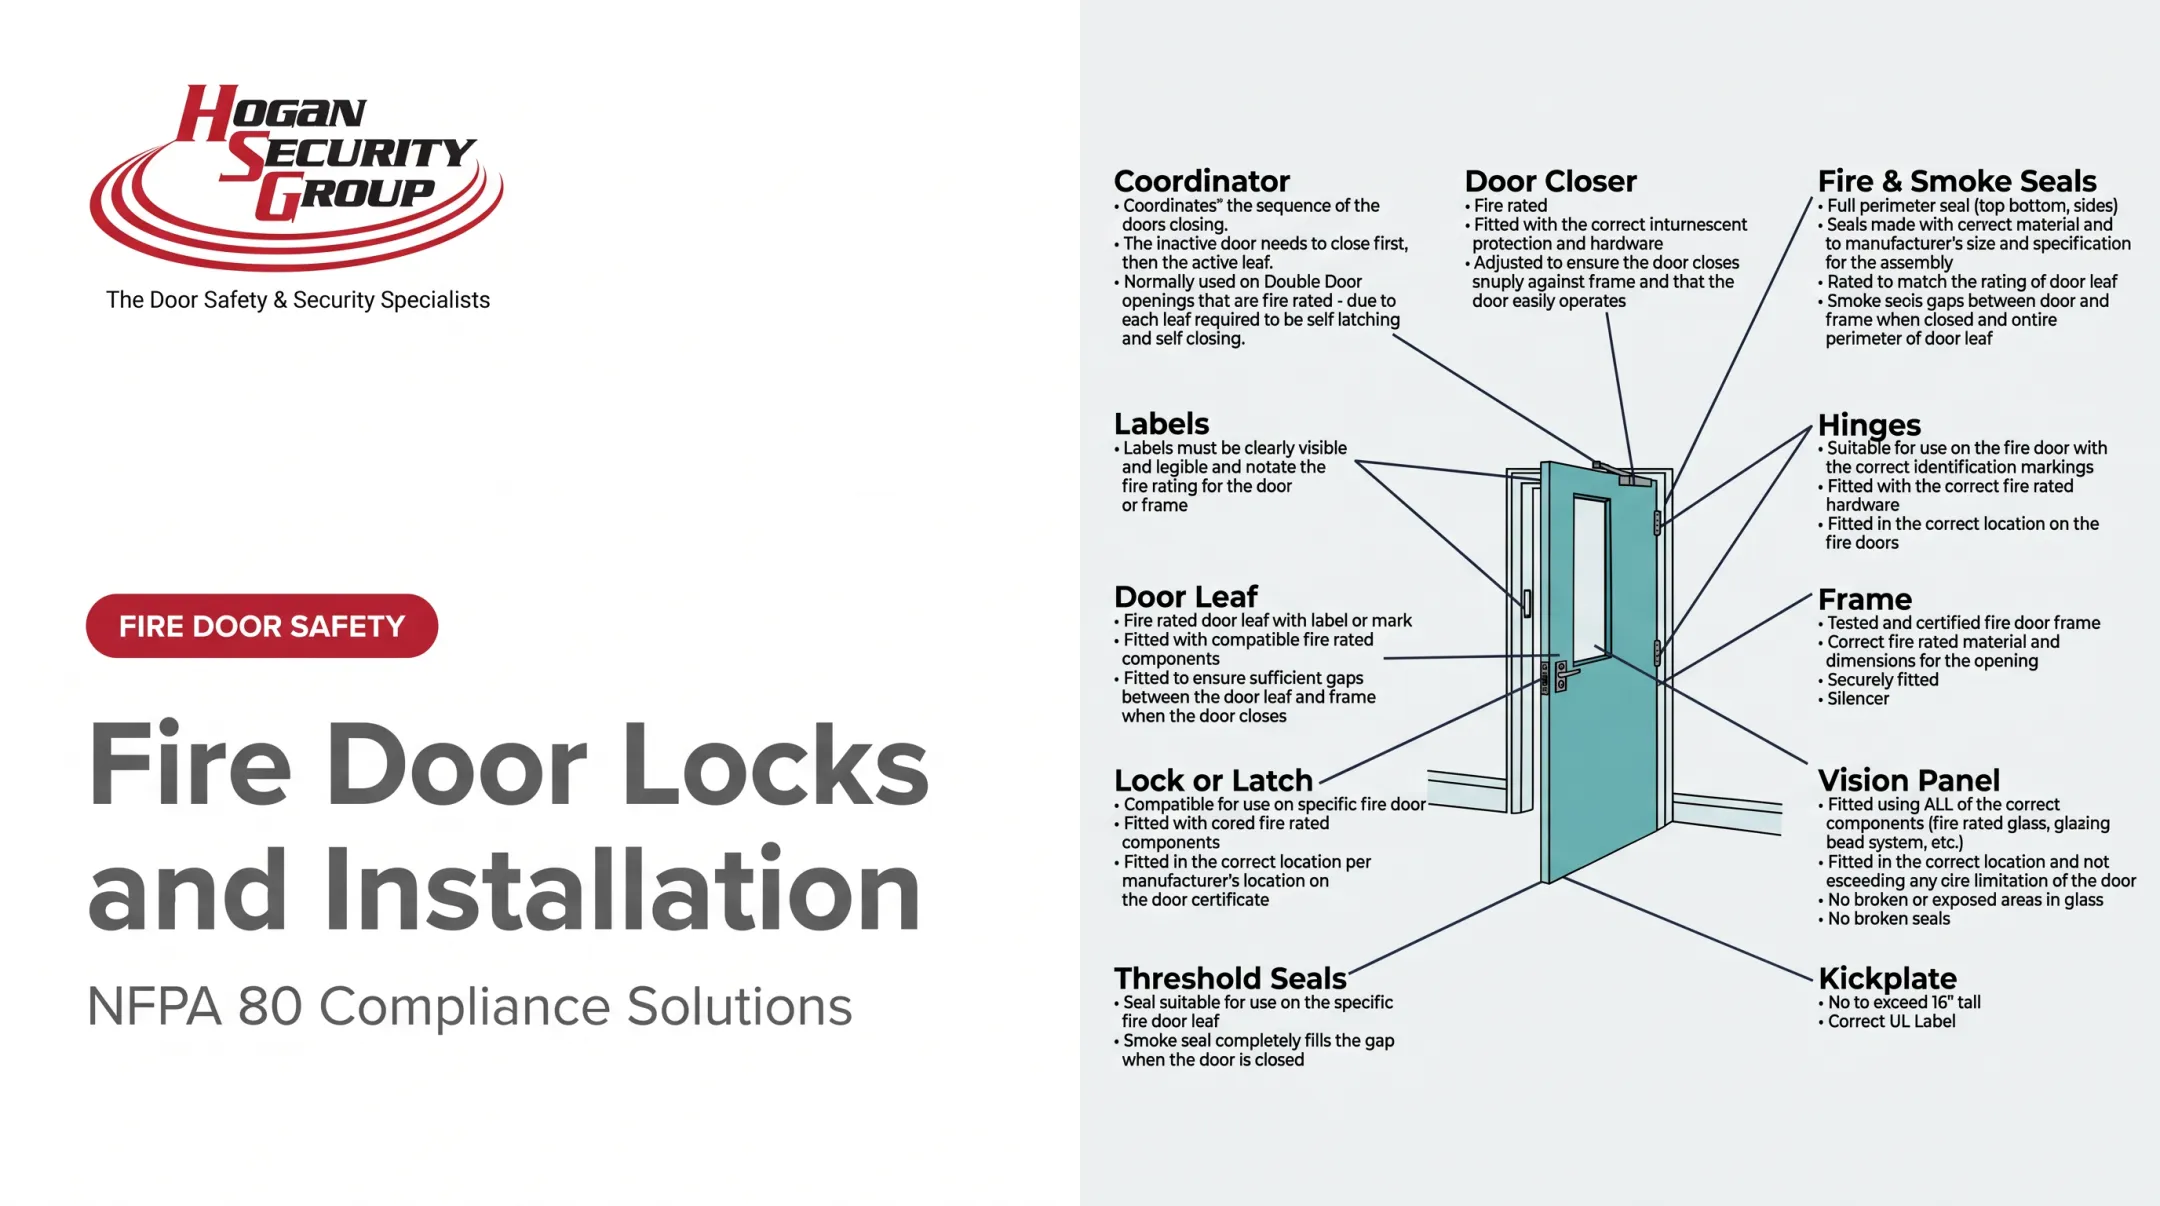
A fire-rated door isn't just a heavy slab with a closer attached. It's a tested assembly, meaning the door, frame, hardware, seals, glazing, the surrounding wall, and any connected release systems all have to work together exactly as they were certified.
Swap one piece for something generic, and the whole assembly can lose its listing. That's why installation should go to a trained commercial door or fire-door specialist who knows how to follow the manufacturer's listing and coordinate with your Authority Having Jurisdiction (AHJ). This isn't a job for a general contractor used to hanging standard interior doors.
Get it wrong, and you're looking at a door that won't close or latch, a voided rating, a failed inspection, expensive rework, and real risk to occupants if a fire actually happens.
This guide walks through preparation, component verification, installation, functional testing, documentation, and ongoing inspection — the full lifecycle of a compliant opening.
Key Takeaways
- A fire-rated door is a complete listed assembly; the slab alone doesn't establish the required protection
- Confirm rating, wall condition, frame, hardware, seals, and glazing before any work begins
- Never drill, trim, or modify components unless the manufacturer's listing permits it
- Test self-closing, positive latching, and hold-open release before calling the job done
- Keep installation records and schedule ongoing inspections per code and manufacturer instructions
Installation Guide for Fire-Rated Doors
Fire-rated door installation generally moves through four phases: assessing the opening and code requirements, preparing and installing the listed assembly, integrating hardware and connected systems, and validating the finished work with documentation.
How long each project takes depends on a lot of variables: the number of openings, whether existing conditions need repair, the required rating, frame type, hardware complexity, and whether the facility has to stay open and operational during the work. A single-opening replacement in an empty office looks nothing like a 40-door retrofit across an occupied school.
Prerequisites and Safety Considerations
Start by confirming the required fire rating (and smoke rating, where applicable) from the construction documents, door schedule, fire-protection plan, or your AHJ. Don't guess based on where the door happens to sit in the building.
Under the 2024 IBC Section 716, opening protectives must comply with the code's fire and smoke protection requirements and be installed in accordance with NFPA80. The rating required often depends on whether the wall is a fire wall, fire barrier, shaft enclosure, or corridor partition — each carries different minimums.
Before installation starts, verify:
- The wall, rough opening, frame type, and floor condition are suitable for the listed assembly
- Anchoring, reinforcement, or approved backfill requirements are understood and available
- The door, frame, hinges, closer, latch or exit hardware, glazing, coordinator, gasketing, and hold-open components are all compatible and listed together
Stop work immediately if: labels are missing or illegible, components are damaged or mismatched, the opening is structurally unsuitable, or someone proposes a field modification that isn't approved by the listing or manufacturer. Pushing forward on any of these creates a door that looks installed but isn't actually compliant.
Tools and Parts Required
Every project needs a baseline kit, though specifics vary by opening type and hardware package:
- Listed door and frame matched to the required rating
- Approved hardware set (hinges, closer, latch/lock or exit device, coordinator, threshold)
- Manufacturer-specified fasteners and intumescent/smoke seals
- Shims, levels, tape measures, and a gap gauge for clearance checks
- Hardware installation templates
- Labeling and listing documentation for the record
- Standard jobsite PPE
Closers, exit devices, glazing kits, and hold-open systems often require manufacturer-specific templates or tools you won't find in a general toolbox. Before substituting fasteners, sealants, backfill material, or tools for something more convenient, check the manufacturer's installation instructions. A generic drywall screw or a different sealant brand can invalidate the whole assembly, and nobody finds out until an inspector shows up.
How to Install Fire-Rated Doors Step by Step
Shortcuts here tend to hide problems rather than solve them. Installing hardware before correcting a bad frame, or trimming a door to force a fit, creates compliance failures that are invisible until the door fails to close properly, or until an inspector catches it.
- Verify the assembly first. Match door and frame labels against the required rating, compare every hardware component to the listing, and inspect for shipping or jobsite damage. Document any discrepancies before work proceeds.
- Prepare and install the frame. Confirm opening dimensions and wall type, then set the frame plumb, level, and square. Secure it using the approved anchoring method and follow the listing for any required reinforcement or backfill.
- Hang and align the door. Use the listed hinges and fasteners, keep the label visible and undamaged, and confirm the door swings freely without binding. Measure perimeter clearances against NFPA80 and the specific listing requirements.
- Install and adjust hardware. Fit the closer, latch or lock, exit device, coordinator, threshold, glazing, and seals according to their templates. The door should close fully and latch positively without someone having to shove it.
- Integrate connected systems. Coordinate electromagnetic hold-open or release devices with the fire alarm system and test that activation actually releases the door to close and latch. Wedges, kick-down stops, and chains are never acceptable substitutes for approved hold-open hardware.

Post-Installation Checks and Validation
Before calling the job complete, run a visual and structural review of the door, frame, hinges, fasteners, labels, glazing, seals, and surrounding wall. Look for damage, missing parts, open holes, loose components, or any modification that wasn't part of the approved scope.
Then function-test from multiple open positions:
| Check | What to confirm |
|---|---|
| Self-closing | Door closes completely from fully open |
| Latching | Hardware secures the closed door without force |
| Pair sequencing | Inactive leaf closes before active leaf (where applicable) |
| Clearances | Perimeter gaps fall within listing tolerances |
| Hold-open/release | Device releases on alarm activation and door latches |
Perimeter clearance limits aren't one-size-fits-all. NFPA Journal's 2019 report notes that nominal clearances between the door and frame typically run around 1/8 inch, with construction-specific tolerances of plus or minus 1/16 inch depending on door type — so always check the actual listing rather than assuming a universal number.
Record the rating, listing agency, component details, test results, installer information, any deficiencies found, corrective actions taken, and the completion date. This creates an auditable record for facility staff and the AHJ. And remember: passing validation at turnover isn't the finish line. Every rated opening needs an ongoing inspection and maintenance process appropriate to the facility and occupancy.
Common Installation Problems and Fixes
Most installation failures trace back to a handful of root causes. Correcting them always has to stay within the specific listing. A qualified professional should make the call, not a field guess.
Issue 1: The Door Doesn't Close or Latch Completely
The slab binds, the closer lacks adjustment range, the strike is misaligned, or a seal creates too much resistance. Usually this points to an out-of-square frame, mismatched hardware, poor adjustment, or an obstruction nobody noticed.
Fix: Correct frame alignment and confirm hardware compatibility first. Never remove required seals or weaken the door to force it to operate. That solves the symptom while destroying the rating.
Issue 2: Gaps, Labels, or Seals Fail Inspection
Perimeter clearances exceed permitted limits, labels got painted over or removed, or intumescent and smoke seals are incomplete or damaged. This often comes from incorrect sizing, frame movement over time, over-trimming during install, or someone substituting non-listed seals.
Fix: Measure and document the actual condition, then consult the listing or manufacturer before repairing or replacing anything. NFPA's 2025 FAQ confirms painting over fire-door labels isn't recommended, even when the embossed lettering technically stays legible underneath.
Issue 3: Hardware or Hold-Open Equipment Isn't Listed or Doesn't Release
The assembly ends up with standard hardware, an unapproved door stop, incompatible access-control hardware, or a hold-open device that simply doesn't release on alarm. This usually happens when hardware gets selected independently of the door assembly, or connected systems never get tested together.
Fix: Replace the component with a listed solution and test the full fire alarm interface sequence with qualified personnel, not just the hardware in isolation.

Pro Tips for Installing Fire-Rated Doors Effectively
A few habits separate a smooth multi-door project from a mess of rework and change orders:
- Survey before you schedule. Walk every opening first, group compatible repairs or replacements, and coordinate shutdowns and fire-alarm testing around actual operating hours. This matters most for occupied schools, hospitals, and campuses that can't close for a week.
- Document everything before it's covered up. Photograph labels before finishing, keep listing and manufacturer paperwork, log measurements and test results, and give facility staff clear operating and maintenance instructions.
- Treat "it should still work" as a red flag. A standard door, lock, closer, or access-control device shouldn't move onto a fire-rated assembly without confirming it's actually permitted by the listing.
- Pick an installer on qualifications, not just price. Prioritize relevant training, manufacturer familiarity, licensing, commercial door experience, and the ability to document and fix deficiencies over the lowest quote.
This is where a dedicated specialist earns its keep. Hogan Security Group has worked on more than 65,000 doors since 1982. Its field data from 2025 found that over 65% of fire doors failed their annual inspection, though more than 90% of those failures could be corrected quickly within a normal facility maintenance budget. That gap between "failing" and "unfixable" is exactly why catching problems early matters.
Hogan's technicians are Certified Fire Door Assembly Inspectors (FDAI) and work directly with manufacturers including Allegion, Assa Abloy, dormakaba, and Special-Lite on installation, repair, and replacement. That certification supports a strong inspection process; it doesn't replace AHJ approval, which still governs the final sign-off.
Finally, schedule a handoff meeting with maintenance staff. Fire doors need to stay unobstructed, self-closing, free of unauthorized hardware, and on the facility's recurring inspection schedule. None of that happens automatically once the installer leaves.

Conclusion
Installation quality is what determines whether a fire-rated door actually contains fire and smoke, protects occupants, supports safe egress, and passes inspection when it counts. There's no partial credit. A door that mostly closes is not a compliant door.
Stay compliant by locking in the basics:
- Plan around the listed assembly
- Bring in commercial door professionals
- Validate every opening
- Keep your documentation current
- Fix deficiencies as soon as they surface, not at the next inspection cycle
If you manage a school, hospital, campus, warehouse, or commercial property across New Jersey, Pennsylvania, New York, Connecticut, or Delaware, Hogan Security Group can provide a professional fire-door assessment or handle the installation itself. Reach the team at 609-737-8100 or info@hogansecurity.com.
Frequently Asked Questions
How much does it cost to install a fire door?
Cost depends on the required rating, condition of the opening, hardware package, seals, any structural corrections, access-control integration, and how many openings are involved. Get a quote based on your specific project rather than relying on a generic per-door figure.
Can you fireproof an existing door?
An existing door may be repairable or reusable only if its label, construction, frame, and hardware stay within a listed assembly. Have a qualified professional inspect it before painting, trimming, drilling, or adding anything.
Can you put a fire door on a normal frame?
No. The frame is part of the rated assembly and must be approved for that door's rating, wall type, and hardware. A standard non-rated frame shouldn't be assumed acceptable just because the door fits physically.
What is the code for a fire-rated door?
NFPA80 and the applicable International Building Code provisions govern fire-rated door assemblies, along with local amendments, the manufacturer's listing, and direction from your AHJ. The required rating depends on the wall, occupancy, and opening involved.
What are the requirements for fire doors?
A compatible labeled door and frame, listed hardware, required seals or glazing, clearances within permitted limits, and self-closing, positive-latching operation. Labels must stay intact and legible, and the assembly needs regular inspection with documentation.
What should you not do with fire doors?
Don't prop them open, remove closers or seals, install unlisted hardware, paint over labels, drill or trim without approval, block egress paths, or ignore a door that won't close and latch properly. Any one of these can void the rating.