
Introduction
Fire exit door installation looks simple until the first inspection fails. Many facility teams treat it like a routine door swap: measure the opening, hang a slab, call it done. That approach misses what a fire exit door actually has to do.
It must support safe egress, hold a tested fire rating when required, and latch reliably every time, under real conditions, not just on installation day.
Hogan Security Group's inspection data shows more than 65% of fire doors fail their first annual inspection, though most of those failures can be corrected within a standard facility-management budget. Problems usually trace back to the installation stage.
This work calls for qualified commercial-door technicians, fire-door specialists, or trained in-house staff. Consult the authority having jurisdiction (AHJ) whenever local requirements are unclear. Get it wrong and you risk:
- Blocked evacuation routes
- Voided fire ratings
- Failed inspections
- Expensive rework
This guide covers:
- Assessing the opening
- Confirming code and product compatibility
- Installing the door and hardware
- Testing egress operation
- Documenting the finished work
Key Takeaways
- Treat the fire exit door as one coordinated assembly: door, frame, hardware, closer, and seals together
- Confirm occupancy, egress requirements, fire rating, handing, and AHJ expectations before ordering or drilling
- Never trade free egress for security; panic hardware, self-closing, and clear operation always come first
- Hand over inspection records, product labels, manufacturer instructions, and a maintenance schedule at closeout
Installation Guide for Fire Exit Doors
The process generally follows a sequence: assessment and preparation, product selection, opening and frame preparation, door and hardware installation, system integration, and finally testing and documentation.
Complexity varies widely. A straightforward replacement in good framing is a different job from a new opening, a fire-rated assembly, a damaged frame, or electrified hardware that needs to talk to an access-control panel.
Prerequisites and Safety Considerations
Before any drilling starts, confirm the basics:
- Determine the door's role in the means of egress, including occupant use, direction of travel, and whether it's an emergency exit, a fire door, or a combined fire-exit assembly
- Check adopted local requirements against NFPA80, NFPA 101, the IBC, the IFC, and state or local amendments
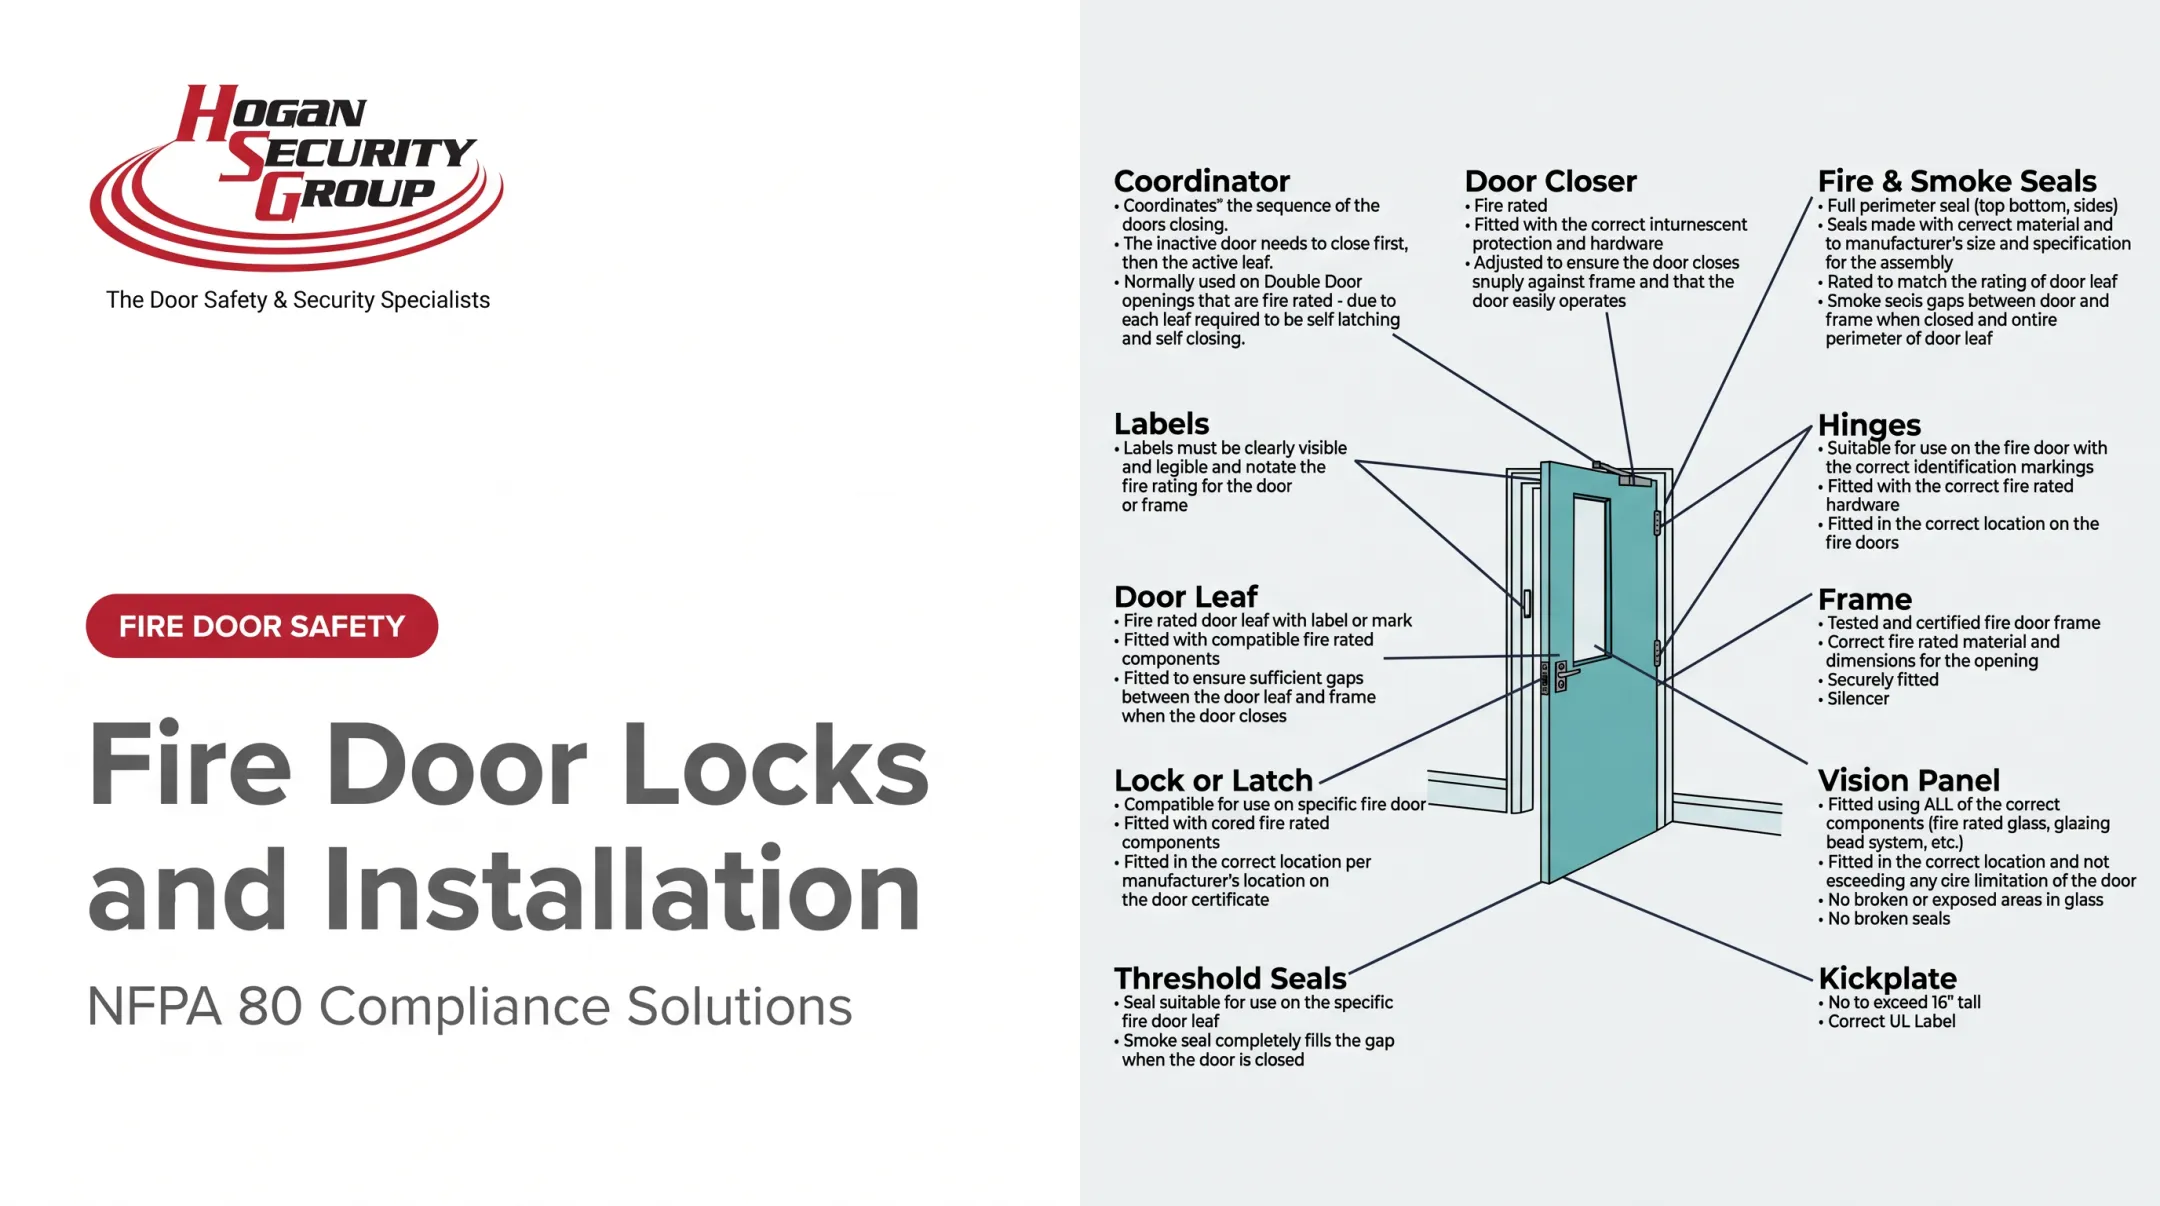
- Verify every component is listed and labeled for the assembly: door, frame, hinges, exit device, closer, latch, strike, seals, and glazing need compatible listings
- Inspect the opening itself for size, frame condition, wall construction, sill, floor level, hinge reinforcement, and existing damage
Confirm project-specific code interpretation with the AHJ rather than assuming a national default. Listings must be compatible across the full assembly, not just a visual match.
A note on accessibility: fire doors are treated differently than standard interior doors. The ADA's opening-force rules exclude fire doors from the standard 5-pound-force limit that applies to other interior doors, directing installers instead to the minimum force allowed by the applicable authority.
Do not proceed if you're facing an unidentified or damaged fire-rated assembly, incompatible replacement hardware, a blocked egress route, or any condition that would prevent the door from closing and latching correctly. Pausing here is cheaper than reworking an installed door.
Tools and Parts Required
Pull together your checklist before the crew shows up on site. Essentials typically include:
- Manufacturer installation instructions and templates, tape measure, level, drill and bits, screwdrivers, approved fasteners, shims, and PPE
- Door slab, frame, hinges or pivots, exit device, strike, closer, latch, trim, smoke or intumescent seals, and approved firestopping materials where specified
- Testing and documentation materials: a checklist, product labels, a camera, inspection forms, and any access-control test equipment needed
One detail that trips up crews: manufacturer-specified fasteners aren't interchangeable with whatever's in the truck. Von Duprin's installation instructions for its 98/99 rim exit devices, for example, call for specific through-bolts at a defined step, not generic hardware-store screws.
Generic substitutions void the listing unless the manufacturer expressly permits them. Standard steel fire-rated frames generally don't require grout fill unless the specific fire-protection listing calls for it, so don't add steps the assembly doesn't need.
How to Install Fire Exit Doors (Step-by-Step)
Follow the manufacturer's sequence, and don't drill, trim, or modify anything until handing, dimensions, rating, and hardware compatibility are all confirmed.
- Prepare the opening - verify dimensions and plumb, repair unsuitable framing, clear obstructions, and protect the egress path while work is underway
- Position and secure the frame and door - use approved anchors and shims, keep an even reveal, confirm hinge alignment, and avoid overtightening fasteners that could distort the frame or bind the door
- Install the exit device and strike using the manufacturer's template, confirming correct handing, full latch retraction, strike alignment, and properly seated through-bolts
- Add supporting hardware - closer, latch, seals, glazing, kick plates, and signage - making sure nothing interferes with the door's listed function
- Coordinate access control or electrified hardware only when the specific system is approved for the application and still allows immediate emergency release
- Make only listing-permitted field adjustments. Don't drill through labels, remove required hardware, trim the door slab, or swap components in ways that change the tested assembly

This is where Hogan Security Group's crews slow down rather than speed up. On a 2025 surgery-center project, fire-rated hardware was specifically matched to bring an out-of-compliance opening back into NFPA80 territory, rather than reusing whatever was already on hand.
Project Scope and Installation Cost Factors
A meaningful quote identifies the door and frame type, fire rating, exit-device function, closer and seal requirements, labor, permits or inspections, removal and disposal, surface repairs, access-control coordination, testing, and documentation.
Pricing varies too much by region, building type, and scope for a single national number to mean much. Treat any generic range you find online with skepticism and get a site-specific commercial quote instead.
What tends to push costs up:
- A damaged or nonstandard opening that needs frame repair before a new door can go in
- Custom dimensions or higher fire-rated/labeled assemblies
- New access-control or electrified hardware integration
- Multiple doors across a facility, or work that has to happen around occupants
- Corrections ordered by the AHJ after a failed inspection
Post-Installation Checks and Validation
The job isn't finished when the door is hung. It's finished when the whole assembly has been tested and the results written down.
Visual and structural checks:
- Labels remain visible, fasteners are secure, and the frame is plumb
- Seals are continuous and gaps are consistent around the perimeter
- Hinges and hardware show no damage, and the exit route stays clear
Function testing from the egress side matters more than anything else on this list. The panic bar or push pad should release the latch smoothly, the door should open without excessive force or special knowledge, and the device should reset cleanly after release.
Front-approach clearances on the pull side generally need 60 inches perpendicular and 18 inches beyond the latch side, with different figures on the push side. Measure rather than eyeball it.
Confirm the door closes and positively latches under its own closer, without rubbing, binding, or requiring someone to pull it shut. Test any alarm interface, access-control release, or delayed-egress function against the approved design.
Finally, record product labels, installation details, test results, deficiencies, corrective actions, and photographs. Written inspection records need to be signed and kept available for the AHJ, and most jurisdictions expect retention for at least three years.

Common Installation Problems and Fixes
Most failures don't come from a bad door slab. They come from wrong product selection, poor alignment, unapproved field changes, or skipped final testing.
Misidentified or Incompatible Fire-Rated Assembly
Problem: The door, frame, exit device, closer, glazing, or seals don't share compatible listings or the required fire rating. This usually happens when components are ordered separately without checking the full assembly, or when original hardware is swapped for something that only looks similar.
Fix: Pause installation, verify labels and manufacturer documentation, and source components approved for that specific assembly. A fire-rated frame requires a matching fire-rated door, not just a door that fits the opening.
Exit Device Does Not Latch or Release Reliably
Problem: The latch drags on the strike, the crossbar doesn't retract fully, or the door won't latch after closing. For larger assembly or education spaces, occupant-load rules generally require panic or fire exit hardware—this is a life-safety issue, not a convenience fix.
Likely causes:
- Incorrect handing
- Inaccurate template layout
- Misaligned frame
- Overtightened hardware
Fix: Confirm the manufacturer's dimensions and handing, realign the strike and frame, test the latch independent of door weight, and replace damaged parts before returning the door to service.
Door Closes Poorly or Egress Is Obstructed
Problem: The door binds, stays open, needs excessive force, slams shut, or is blocked by furniture, thresholds, or stored materials.
Likely causes:
- Poor hinge or closer adjustment
- Uneven flooring
- Excessive or mismatched seals
- Frame distortion
- Building changes that narrowed the escape path
Fix: Correct alignment and closer settings, clear obstructions, and preserve required clearances. Bring in a qualified specialist when anything may affect the fire rating or accessibility compliance.

Pro Tips for Installing Fire Exit Doors Effectively
A few habits separate smooth projects from ones that drag into rework:
- Sequence around occupancy. Install before the facility opens or before finish trades close off frame access. On schools, hospitals, and campuses, plan shutdowns, deliveries, fire-watch needs, and occupant notices in advance.
- Build a door-by-door schedule. Record location, handing, rating, hardware function, access-control dependencies, deficiencies, and sign-off. One shared log often replaces a dozen follow-up calls on multi-building portfolios.
- Keep documentation together. Store manufacturer instructions, labels, product data, and inspection history in one place so later repairs do not introduce incompatible parts.
- Know when to call a specialist. Fire-rated assemblies, damaged frames, electrified or delayed-egress hardware, new openings, or AHJ corrections usually justify dedicated expertise instead of stretching an in-house team.
Hogan Security Group engineers, supplies, installs, and services commercial door assemblies across New Jersey, Pennsylvania, New York, Connecticut, and Delaware. The company has completed work on more than 65,000 doors, backed by FDAI fire door assembly inspector certification and direct manufacturer relationships with Allegion, Assa Abloy, dormakaba, and others.
A 2025 middle-school project, for example, required electrified panic hardware that combined life-safety knowledge with access-control coordination in one install.
Conclusion
A fire exit door has one job that can't be compromised: dependable emergency egress, alongside any required fire and smoke protection. Installation quality determines whether that door passes inspection, keeps occupants safe, and lasts through years of daily use.
Lock in these basics on every opening:
- Verify requirements early
- Use listed and compatible components
- Follow manufacturer instructions to the letter
- Document every test
When a project involves a fire-rated assembly, a damaged frame, or electrified hardware, schedule qualified inspection or installation support before the door goes into service. That phone call is worth the cost.
Frequently Asked Questions
What are the fire code requirements for fire exit door installation?
Requirements depend on occupancy, exit-route design, adopted codes, fire-rating needs, hardware, accessibility, and local amendments. There's no single universal rule, so confirm specifics with your AHJ and the applicable manufacturer listings.
How much does fire exit door installation cost?
Cost depends on the door and frame, rating, exit hardware, opening condition, labor, permits, access-control coordination, and documentation needs. Get a site-specific commercial quote rather than relying on a generic online estimate.
Do fire exit doors need panic hardware?
It depends on occupancy, occupant load, door location, and the adopted code edition. Under the 2024 International Building Code, swinging doors serving certain assembly or education spaces with higher occupant loads require panic or fire exit hardware rather than a standard latch.
Can an access-control system be installed on a fire exit door?
Access control can work on a fire exit door when the design and hardware are approved for that specific application. Emergency egress can never be obstructed, and the system needs power-loss release, alarm coordination, and AHJ sign-off.
Should a professional install a fire exit door?
Yes, particularly for labeled fire-rated assemblies, new openings, damaged frames, panic hardware, closers, or electrified systems. Trained technicians know how to test and document the work so it passes inspection the first time.